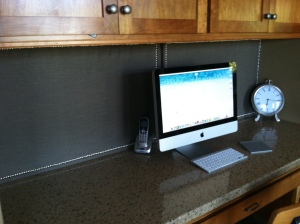
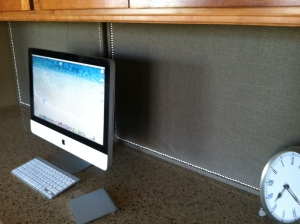
You may remember my post about upholstered bulletin boards for a client… (found here)
We wanted to clean up a desk space in their kitchen and make it look a little more attractive. This is an easy project that anyone with a staple gun can do own their own.
Step 1: Find a bulletin board.
Luckily my clients already had 2 bulletin boards that were pretty beat up that they were no longer using. (They were actually sitting in the garage ready to be thrown out!)
Step 2: Lay out the fabric you are planning on using and cut to size.
You only need about 4″ of over hang on all sizes of your bulletin board. This is in order to wrap the fabric neatly to the back and attach with a staple gun.
Step 3: Get your nailhead of choice to decorate edges. I found these at my local Hancock fabrics and JoAnn fabric stores. (I had to go to several to get enough to do 2 large boards)
Step 4: Start on one side of the board and push nailheads, one by one in a line along the inside frame of the board. I found it easier to use my thumb to push them in instead of a hammer.
TIP: Use a soap or fabric pen and straight edge to draw the line on the fabric where you want to push the nailheads in. I learned this the hard way by having to keep pulling out the nailheads and re-aligning them to get a straight line. Next time I will use a fabric pen!
ANOTHER TIP: I found it much easier to do one entire side of the board, and then continue on the opposite side pulling the fabric tight as I went. This allowed me to keep the fabric straight so it wouldn’t look crooked.
Step 5: Once you have the nailheads in place, you take the overhang of fabric and wrap around to the back of the board. The trickiest part to this is the corners. I took the point of each corner of fabric and attached first. Then taking each side and folding over. As long as you keep the fabric smooth and not bulky, it will look fine!
That’s it! A really easy project, very inexpensive, and can completely update a messy corner in your home.
Here are the pics once the boards were installed:


Comments
I'm going to have to try this with the nailheads. I've done this before several times, but never with the nailheads. Thanks for the tips!